Supplies you need:
*1/2" plywood make sure you leave about an inch on both sides of your bedframe when measuring (ours was measured for a Cal King and the size is 72"W x 40"H. I think this will work for a King too. But it also depends on the height you are looking for.) Home Depot will cut it for free and give you the extra wood.
*batting (we bought some from JoAnn's. It was a queen size and we had WAY too much. You could probably get away with twin. But the leftovers are nice if you are making pillows.)
*Foam Pad (twin size 2 inches thick. The thicker the better. We could not find any at JoAnn's that would fit. So we ended up buying two 1 inch foam pads at WalMart and glueing them together.)
*Spray Adhesive (WalMart $4ish. Elmer's brand has a good one)
*3 yards Fabric (We bought 4 yards. I needed extra for a pillow and you will need extra for your covered buttons. But 3 yards is plenty!! Upholstered fabric is the best but it can also very pricey. Look for a stronger fabric that is still cheap. I think ours was $9.99 a yard. But look for 40% off coupons. They save you!)
*Button Cover kits (WalMart. $1.75ish. We bought 4 because there are only 4 buttons in one kit and we needed 16.)
*Staple Gun ($10-$30 Home Depot)
*pencil
*calculator (for doing the math for the tufts)
*3" long needle
*thread (doesn't need to match fabric because it doesn't show)
*hammer
*and a patient husband to help you!!
Step 1: Lay your plywood face down.
Measure where you want your tufts.
This was the hardest/longest part.
Tip: you don't see almost half of the headboard so don't worry about tufting towards the bottom.
Place your button coverings in place of the holes to see if it looks good.
Use your calculator to get exact measurements.
The first row we did 5 the second 6 the third 5.

Step 2: Drill a hole through the wood just the size of a needle. (you will make them bigger later)

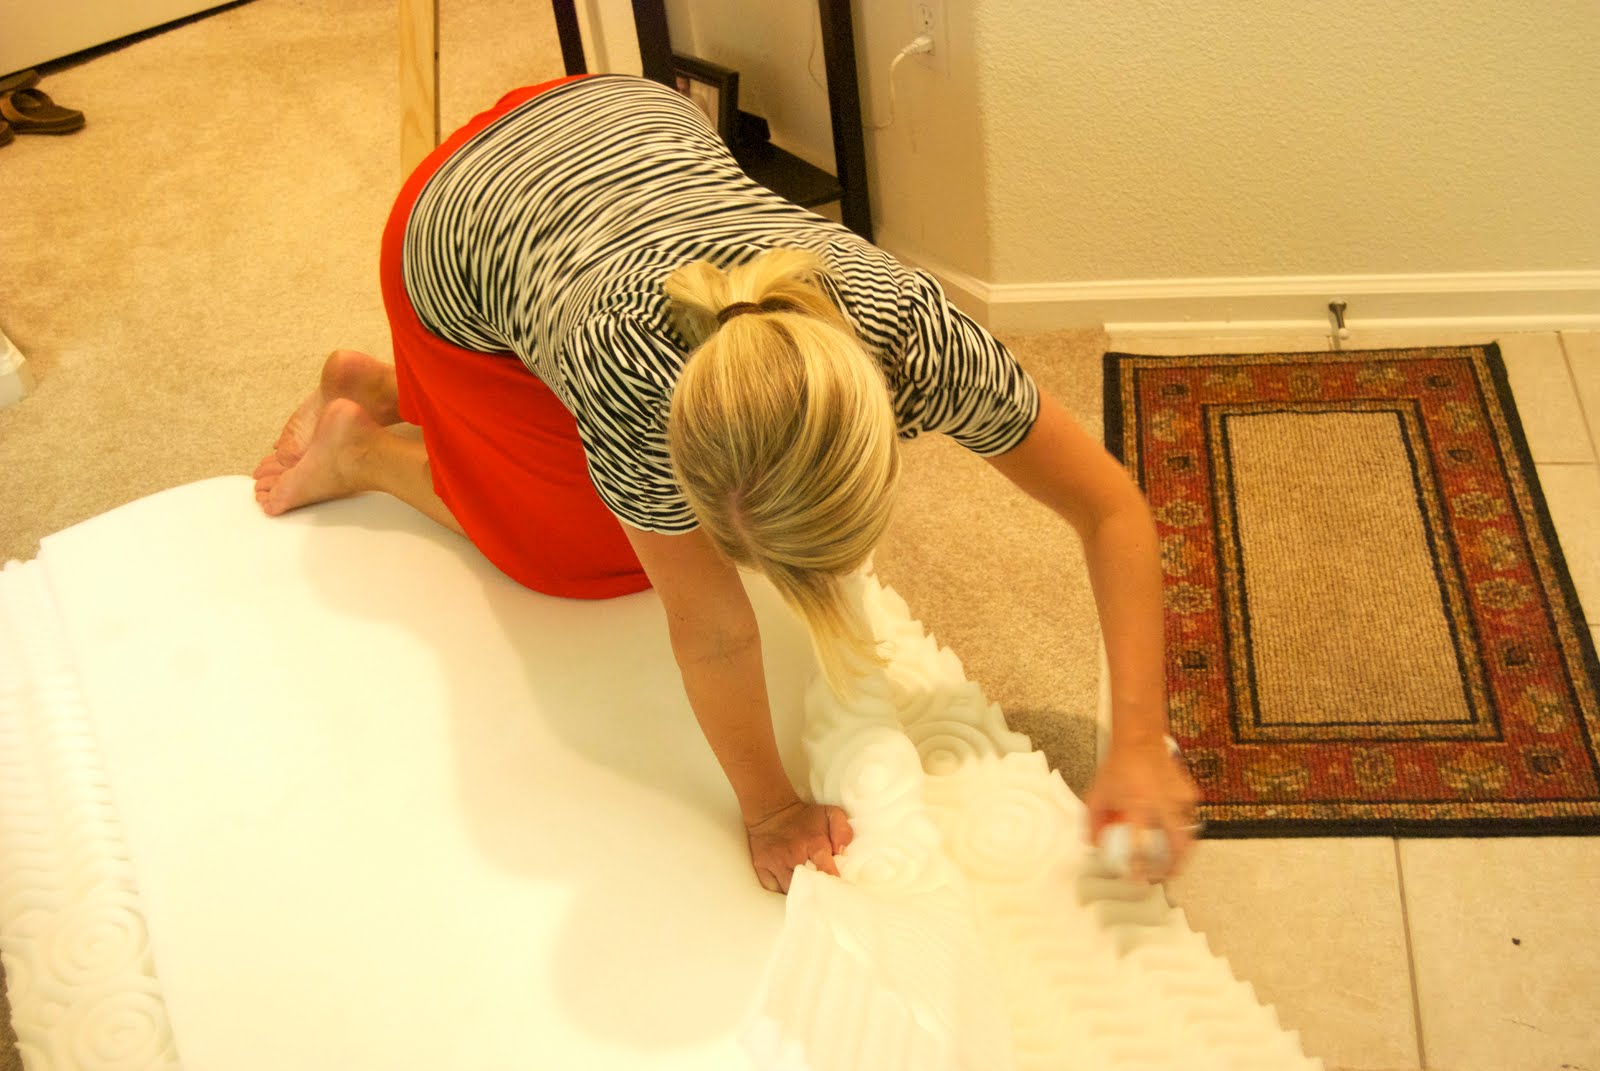
Step 3: Spray adhesive on plywood and quickly place foam pad on top.
cut remaining foam if any. Foam should fit the plywood exactly!
Step 4: Iron fabric.
With the right side facing down, lay fabric on the floor. (as you can see mine still has wrinkles. It is ok, because you stretch it later, so the wrinkles disappear.)
Step 5: Place batting on top of fabric. It is very important that your batting is not bumpy. If it is, it will ruffle the fabric and you will be able to tell.
Step 6: Place plywood with foam facing down on top of batting and fabric.
Make sure it is centered (as pictured) and not wrinkled with enough room on each side to pull around.
Step 7: Start with the bottom of headboard. Fold batting and fabric around to backside of plywood.
Staple along the edge, but leave about 3 inches towards the ends.
Repeat with the top of the headboard.
Make sure you pull your fabric tightly so that there are no wrinkles. Be careful though because some fabrics stretch too much and can ruin the grain. (is that what its called??)
Step 8: Fold the corner under as shown.
It might look horrible in the back, but make sure it looks good from the front.
Step 9: staple in place
Repeat Step 8 and 9 on all corners.
Step 10: Staple all around the edges and make sure it is secure.
This is what the back should look like. Pretty??
And the front. 2 am has never looked so good. haha
If you don't want to do the tufts, you are done!
(I will show you later what we used to mount this baby to our bed...I mean wall.)
Step 11: Cover your buttons with matching fabric.
(directions on how to do this are on the box. Very easy.)
Step 12: triple your thread and thread the needle. Poke through hole that you drilled in Step 1.
Step 13: Push it through to the front. (you can leave the holes as they are, but it is harder because they are so small.)
I thread it through to the front, (as pictured) and then moved the needled back and forth until it made a little hole in the fabric. This helped me see where I needed the needle to be when I made the hole bigger. Do this to all your holes.)
Step 14: Drill holes in the back of the wood again, but this time make them a lot larger.
Repeat steps 12 and 13 but once you bring your needle to the front thread through the button and thread back through the fabric, batting, foam, wood and back through the hole.
Repeat for all tufts.
This is a tricky part and takes a very long time!
Step 15: pull needle and thread tightly so that you get an indention on the front.
Make sure they are all pretty evenly indented.
Step 16: Staple the thread down in the back and hammer so the thread doesn't slip through the hole.
This is what your staples should look like for security.
Here is the front with the tufts.
And this is what the back should look like.
Finished product.
To mount this we bought two Heavy Duty Ring Hangers (2hole, wide). The brand is OOK. Go to Home Depot and tell them that is what you need. (it says all of that on the box)
And the other thing you need is a hook so that the hangers can hang. (hehe) On my receipt it says LG Hanger. I have the sku number if you need it! :)
Then mount the hook to the wall and nail the hanger to the back of the headboard.
(I had Cason do this part.)
It hangs like a picture on your wall just behind your bed.
All in all this headboard cost us around $130. You save tons of money, especially because tufted upholstered headboards are alot! You can make it cheaper without doing the tufts and if you choose fabric that is on sale or cheaper. And if you don't like it in 5 years or so, you can just change the fabric.
I hope this makes sense!! If you have any questions please comment below!
Good luck! Send me your finished products. marieburr@hotmail.com
I would love to see!!